1880s Hat Conversion

Once I’d finished my 1880s Squirrel Dress, I had to have a hat to go with it. I have yet to venture into completely handmade millinery, so I’m always eager to find existing hats that can be adapted to more historical uses. My favorite may always be the Regency Cowboy Hat bonnet, but this one is a close second– I made it from a children’s trilby hat in bright pink.

I was going for something along the lines of the hat in the center here:

Or this one, from the Met Museum.

Both are probably slightly too early in the period to match my dress, but they’re just so pretty that I decided to go for it anyway.

Continue reading

Girls Block-Printed Regency Dress

With the pandemic and all, I’ve had tons of time to make costumes but no place to wear them. Imagine my excitement when I came across a Regency event that was not only nearby, but on my birthday weekend! Clearly, it was a sign from above that it was time to get back into the swing of things! And since it was my birthday, I had the perfect excuse to insist that my husband and daughter accompany me. In costume.

(cue disgusted face from my 9-year-old)

As you may recall, my daughter has never been thrilled about dressing up for historical-themed events, but she can be convinced with the proper incentive. In this case, I told her that her participation could be my birthday present– and promised to work bunnies into the outfit, since she’s really into bunnies right now. And it worked, so the only thing that remained was to find some vaguely appropriate bunny-themed fabric… which was basically impossible. Of course.

Continue reading

Lady Macbeth Beetlewing Gown, Part XI: Belt

Once the dress was structurally complete I got started on the belt (which had to sit a certain way over the dress to look right). The original belt for the gown appears to have been made of metal links with a raised design on them– the belt wraps twice around the waist and ties in front with a length of twisted fabric.

Initially I thought I’d repurpose some belly-dancing belts with similar metal links to make my own belt, but they were pretty expensive and didn’t have the right overall look– too much filigree, not quite the right shape. I decided to make my own, because deciding to spend ridiculous amounts of time and effort to closely replicate a costume element that I’d intended to shortcut is apparently what I do.

Since I didn’t have the time, knowledge, or supplies to make my own stamped metal links (yet), I opted to use thick black cardstock– it’s called “museum board” and it’s pretty stiff while still being cuttable. I figured that once painted with metallic paint, the links would be close enough to pass for a stage costume.

Continue reading

Fun “Bar” Suit, Part V: Hat and Olive Hatpin

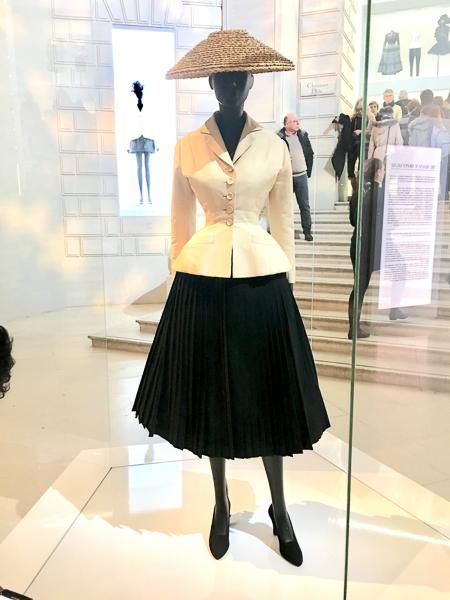
Next up was the hat. The original hat (or a least one of the original hats shown in photos– there appear to be a few) was an almost lampshade-shaped straw hat:

www.revival-retro.com

Tough to find, particularly in winter, and hats can be expensive in vintage shops. Luckily, I found something very similar in the costume section on Ebay! It’s called a “coolie” hat (which I find kind of racist, for what it’s worth) and the photo was pretty close in terms of shape.

s-l1600

Of course, when it arrived it was a lot flimsier than the original hat looked to be, plus being more conical with a less defined crown. I decided to add some wire around the brim to stiffen it up– I unpicked the stitches holding the straw edge binding, then cut off about 3/4″ all around the edge (it was just a bit too big for my taste) before stitching some thick brass wire around the underside and reattaching the binding with hot glue.

bar-hat-edge

Continue reading

Janet (The Good Place) Costume, Part III: Blouse

Image result for janet good place blouse

The blouse was kind of difficult to manage– I didn’t feel like sewing one (and in any event the actual fabric was sold out online), and couldn’t find anything similar ready-made, so I decided that I would try to paint a plain white blouse to match. After a lot of digging on eBay I found a blouse with a banded collar and a ruffle down the front— not quite the right shape of ruffle, but I figured it was close enough to start with.

I decided right away that I would only bother painting the design on the sleeves and collar, since the rest of the blouse wouldn’t show beneath my vest. I carefully detached the sleeves from the blouse, then removed the cuffs and unpicked the stitching from the long seam up the sleeves so I had flat pieces of fabric to work with.

To make my pattern for the painted design I went to the Mood Fabrics site where the fabric was available for sale and adjusted the zoom on my screen until the ruler was actually correctly sized (as measured on screen). Then I just put a piece of paper up to the screen and traced out the design in pencil, going over it in heavy black pen afterwards.

janet-blouse-stencil

I traced the design out onto my fabric using Jacquard water-based resist, basically forming a dam blocking off the areas I wanted to color in. Once the resist was completely dry I stretched the fabric over cardboard frames I’d constructed from a storage box, and pinned the edges to keep it taut. Then I diluted some Jacquard Dye-Na-Flow fabric paint and did some blotchy watercolor painting inside the resist lines in shades of blue.

It totally didn’t work.

Continue reading

1860s Embroidered Ballgown, Part VII: Floral Headpiece

civil-war-wreath-done

The last thing I made for this outfit was a floral headpiece to wear with it– during the 1850s and 1860s it was popular to wear floral crescents for eveningwear, so I got out my paper-covered floral wire from my daughter’s flower girl wreath and went shopping for artificial flowers. I purchased several different shades of blue, with some ivory thrown in for good measure.

First I made a ring out of wire, twisting the ends under, then figured out a general idea for how I wanted my flowers to be placed. After that it was just a matter of hot-gluing things down one by one!

civil-war-wreath

I painted the visible brown parts of the wire with black paint, just to make them blend into my hair color better.

When it came time to wear the wreath, I twisted my hair into a low-rolled updo, and pinned the wreath to the rolls.


Dragonfly Skirt Suit, Part IV: Accessories

As I mentioned earlier, the inspiration for this suit came from these dragonfly hair clips, which I found on eBay. I think they look pretty awesome as-is, but one thing I wanted to change was the transparency of the wings– with the exception of some printed veins they’re completely clear, making them almost invisible from most angles.

s-l1600

I decided to get some iridescent paint to add just a bit more dimension to the wings. I used two thin layers of diluted shimmery white paint– Art Deco Dazzling Metallics White Pearl— to make them slightly more opaque. The paint got a little streaky, to my dismay, but I really didn’t have the time or the inclination to figure out how to fix it, so I left them as-is. I’m going to clip one to my suit lapel and create thread loops to clip the other to my chest.

dragonfly-pin-painted.jpg Continue reading

1915 Picnic Hat With DIY Wired Ribbon

picnic-hat-done

So to go with my 1915 picnic dress, I needed a hat to shade my delicate complexion from the sun (or something like that). I tried using my flowered Edwardian hat but it seemed too elaborate for the relatively casual dress, so I went looking for something new.

Since it’s summer there are plenty of straw hats available, but most of them are pretty floppy and that wasn’t what I was going for. I thought I’d start with something more boater-shaped, but apparently I was cutting it a bit close time-wise because most of the cheap boater options online had a 2-3 week shipping time, which was too late for my upcoming picnic.

I ended up with a costume gondolier hat, which is coarser straw than I would’ve liked, but it looked about right. Many purchasers complained that the crown was too shallow and the head circumference was too big, making it sit oddly on the head, but one reviewer (a woman after my own heart) noted that it was perfect for puffy Victorian/Edwardian hairstyles, which I thought made it worth a try.

picnic-hat-new

Continue reading

Mad Hatter Costume

Like I said, as part of our family costume my husband decided to be the Mad Hatter. Honestly, I mostly put his outfit together from pieces I bought– a velvet blazer, some plaid golf pants, a pair of argyle socks– but some items I just had to make myself.

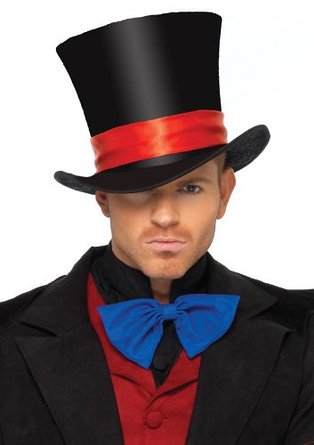
First and foremost was the hat. You know me, I’m the queen of decorated top hats, so while I bought the base hat on Amazon I knew I’d be going to town on the embellishments.

41w2b80s2v4l-_uy445_

The hat itself is huge– not just tall (which it totally is, unlike many of the dinky little so-called “top hats” you find at the lower price points), but also big in circumference. My husband has a pretty big head, and this hat literally fall down past his ears, it was that big.

Continue reading

Painted 1920s Shoes

I can’t believe I never got around to posting about these shoes back when I was making the rest of the outfit! Okay, so these aren’t really 1920s shoes. They’re actually ballroom dance practice shoes– specifically, these:

bl850_main_blk

I’d been looking for a pair of Oxford-style shoes that I could wear with my white 1920s dress to a lawn party, since it appears that the style was popular at the time.

fc2b145e9c3a0681bc75972f06f709ae

I’d had my eye on some ballroom dance shoes because I liked the shape and the perforated leather and thought they’d look great with my outfit, but I couldn’t justify spending the money to get a new pair. Then, by sheer good fortune I found a used pair at my local Goodwill for $6 (basically a 1/10 of the original price), and they were exactly my size! I knew they’d be perfect, if not for one thing– the color.

I didn’t want black shoes– they wouldn’t go well at all with my summery white dress, and I was looking for something light and sporty. But they were so cheap and comfortable (can’t beat ballroom dance shoes for flexibility) that I decided that I would give paint a shot– after all, the shoes were inexpensive, they were leather (which meant they ought to be paintable), and it would only take an evening to finish the project.

Continue reading