
In the course of my reading about constructing Victorian ensembles, I’d come across various methods for making lengths of pleated trim– using a ruffler foot, fork-pleating, eyeballing it, and the “Perfect Pleater.” That last is basically a length of pleated cardboard that you tuck your fabric into and iron to form uniform pleats. Unfortunately name-brand Perfect Pleaters can cost upwards of $150.00, which is kind of insane for something that simple. I knew I’d be making my own at some point, so when I started on my 1880s Squirrel Bustle Dress I figured it was time.
After viewing a couple of online tutorials I decided to follow this one, which seemed the most straightforward and efficient. Instead of posterboard it uses unpasted wallpaper lining paper, which is a nice, heavy paper that comes in rolls so you can make a long pleated section without having to join up separate sheets. Once you’ve marked off your pleating lines and folded them together, you use spray adhesive to glue the whole thing to a fabric backing so it stays together.
I decided to make my pleater board 12×24″ to fit onto my fold-down ironing board– that meant the total length of paper pre-pleating would be three times that long (plus an inch on either end). Since my wallpaper lining was something like 27″ wide, I figured I’d just cut it in half, lengthwise, to make two identical pleater boards– obviously, I did this *after* measuring, marking, and forming my pleats, to avoid having to do twice as much work.
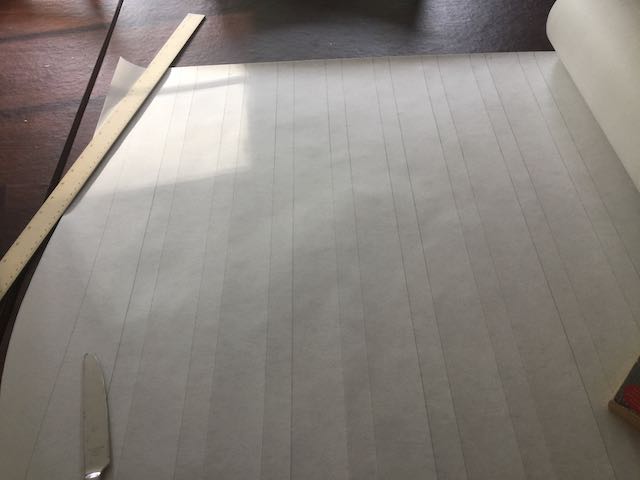
For 1″ pleats with a 1″ return, I marked off alternate lengths of 2″ and 1″ on each side of the paper, then drew in the fold lines with a pencil. Using the tip of a butter knife, I scored the lines to make it easier to fold them later.

I used my metal yardstick to help fold the paper along the scored lines, then ironed the paper flat– or at least, as flat as I could. The large sheet of paper was a little unwieldy to work with at first, but I managed to wrangle it into pleats. Since the iron didn’t do the best job and making those pleats stay flat for long, afterwards I weighed down the whole thing under a flat surface to encourage it to stay flat in preparation for my next step.
I spread out my fabric– a piece of unbleached muslin– on the floor of my garage (with newspapers underneath to keep it clean) and generously sprayed it with adhesive. I will note that when I say “generous,” I really mean it. I tried a light coat for my first attempt and it didn’t work at all– the paper just peeled right off. The second time I generously sprayed both surfaces– the paper and the fabric– and let them sit for one minute before sticking them together. The instructions said it would make for the strongest bond, and it was still not really tightly stuck but at least it was better.
Working from one end to the other, I pressed my pleated paper down onto the fabric (pencilled side down), using my hands to pleat it down onto the surface. It really helped to have an extra pair of hands here– I got my husband to hold the paper in the air with the first few pleats on the floor, so I could press the pleats down a few at a time and avoid wrinkles in the base fabric.
Once all the paper was firmly glued down, I cut off the excess fabric with a 1/2″ border, then marked off the halfway point along its length and cut it into two pleater boards. I folded the fabric borders over on three sides (all except the cut side) and glued them down with regular white glue– this helped keep the backing fabric attached to the paper, and left one side open so it was easier to open up the pleats to insert the to-be-pleated fabric later on.

Here’s a shot of the pleater board in action!


Very clever! I bought the perfect pleater back in the “dark ages” when it was a fraction of that price. Your post is inspiring me to pull it out and pleat something 🙂
LikeLiked by 1 person