Hogwarts Spellbook Cake

When my daughter decided that she wanted a Harry Potter-themed party, perhaps unwisely, I promised to make her whatever kind of cake she wanted… and she chose a three-tiered cake that looked like stacked spellbooks. Made of three different flavors of cake (lemon, chocolate, and marble). Iced in buttercream, not fondant. Oh, boy…

The toughest part was definitely going to be getting nice, smooth, flat book covers without using fondant. Not that I blame her– frosting is definitely tastier– but it was going to be difficult. I thought back to her Kitty House Cake, though, and decided that I would make the book covers out of graham crackers, which were naturally flat and smooth, and had some structure to them.

In order to keep the frosting as smooth and leather-like as possible, I decided to spread it onto a sheet of parchment paper– once spread, I pressed the graham crackers directly into it (for a 9×9″ square cake I ended up with eight crackers per side, plus two more for the spine), then pushed the frosting up over the edges so they would be colored on all visible sides.

Then I spread a bit more frosting on top to keep things sticky, placed my cake up against one edge of the “bottom” cover, and frosted it with white frosting to resemble pages.

Once that was smoothed out, I used the parchment to wrap the rest of the cover over and around it. Luckily for me, the width of the spine was just about the same as the height of the cake, so it worked out nicely. Since it was pretty chilly outside I then put the whole thing under a cover in my garage to chill down and firm up– necessary to be able to unwrap the parchment later without smearing. I will admit that the cakes, once frosted and crackered, ended up being a LOT larger and heavier than I’d anticipated…

I peeled off the parchment paper from each book and carefully transferred each cake to a sheet of cardboard– the bottom one was on a big cardboard presentation board, while the top two were on 8×8″ squares that wouldn’t show once stacked. I pushed drinking straws into the bottom two layers to support the weight of the cakes on top.

Then I stacked the cakes, slightly askew, on top of each other– and they held! They looked great! It was time to decorate. I used a grass tip to make brown fur on the Monster Book of Monsters, but the other two books were left smooth. To add some extra detail I made a batch of candy clay (more on that later) and rolled it out to make book spines, plus one frontispiece for the top book, which I painted with gold highlighter dust and vodka so the books would have legible titles.

And here’s the cake! I love it. Also, it was huge, so I was giving away cake left and right to the party guests, which I’m sure they didn’t mind one bit!

All in all, I think this experiment went well. True, I went through massive amounts of butter to make all the frosting (and the red was inedible due to the sheer amount of red food coloring I had to stir in to get it bright enough– note to self: use the “no taste” coloring next time), but the structure held, and the frosting-covered graham crackers were actually a nice extra treat to nibble on between bites of cake.

I’ll have to try this technique again, perhaps with a smaller cake next time!

Reader’s Digest(ibles): Pumpkin Pasties

To continue the Harry Potter theme, I baked up a quick batch of pumpkin pasties– basically mini hand-pies filled with spiced pumpkin purée. Previously when I’ve made pumpkin-filled desserts I have gone to the trouble of baking a pumpkin custard, basically a pumpkin pie filling, and then scooping it into whatever I’m filling (phyllo triangles, for example), but I was in a bit of a hurry with this one and it ended up tasting just fine, so I’ll give you the recipe as-is.

Not too sweet, these two-bite desserts have a nicely spiced filling and sparkle with coarse sugar on top. I actually like them better cold than hot– the pumpkin flavor seems to come through better that way– but they’re tasty either way!

Continue reading

Reader’s Digest(ibles): Mini Treacle Tarts

In yet another dessert for my daughter’s Hogwarts birthday party, I decided to make miniature treacle tarts– treacle tarts are not only quintessentially British, but the first dessert that Harry eats at Hogwarts!

A moment later the desserts appeared. Blocks of ice cream in every flavor you could think of, apple pies, treacle tarts, chocolate éclairs and jam doughnuts, trifle, strawberries, Jell-O, rice pudding…
As Harry helped himself to a treacle tart, the talk turned to their families.

-Harry Potter and the Sorcerer’s Stone

These are made with a pate sucrée crust and a slightly non-standard filling– the recipe I used had a bit more cream in it than most other recipes I saw later (oops!), which I expect made it less gooey and more custardy in texture than is usual. Also I did have extra filling, which I baked in two small ramekins and enjoyed later with berries on top. Enjoy!

Continue reading

Candy Melt “Wax” Seals

I’ve always loved the old-timey look of envelopes sealed with wax and stamped with a crest– they just look so important and mysterious at the same time. And while I’ve never had a reason to send a letter in such an envelope, an opportunity arose when my daughter decided to have a Harry Potter-themed birthday party.

As you may remember, in Harry Potter and the Sorcerer’s Stone, Harry receives a letter (many letters) from Hogwarts regarding his acceptance, and in the movie those letters are sealed with red wax.

Harry Potter, Star Wars and Jurassic Park - rare film and TV memorabilia  going up for auction in the UK next month - Radio Times

While our party invitations weren’t paper invitations, we did have a Hogwarts seal (included in a fancy quill pen set she got for Christmas), and I was determined to use it. The solution: Cookies!

Continue reading

Butterbeer Ice Cream

BB Ice cream scoop

So remember my rant on Butterbeer? Well, it turns out that Universal Studios also does a butterbeer soft-serve ice cream, and it occurred to me that this could be a great vehicle for my own version of the drink.

Happily, this time my online searching indicated that at least one person has gotten the recipe right and added actual beer to the mix. I decided to make the recipe from the Humphry Slocombe Ice Cream Book to see what all the fuss was about.

This ice cream was pretty fantastic– the oatmeal stout provided a nice backdrop to the main flavor, which was a deep molasses-y caramel, and the salt really brought out the buttery, almost pretzel-like notes of the brown butter. The texture, even after completely frozen, is soft and scoopable, and very rich on the tongue.

Continue reading

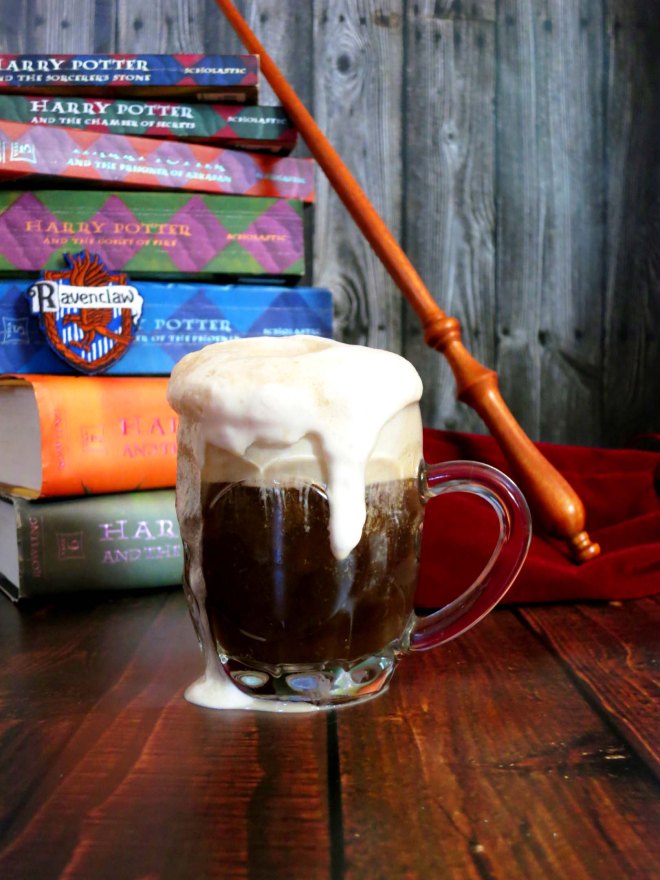
Butterbeer That Deserves the Name

butterbeer

Butterbeer– An iconic beverage, prominently featured in the Harry Potter series and hugely popular at the Universal Studios Wizarding World of Harry Potter. Having heard that the recipe had been approved by J.K. Rowling herself I was eager to try it, and upon arrival at the park (after squee-ing over the storefronts and going on several rides) my friends and I purchased both varieties available– regular and frozen. We watched as the glasses were filled and topped with creamy foam from a special spigot (the bartender said that he was actually forbidden to sell it without the foam because it was such an integral part of the drink), and took our prizes to a table to taste.

Blech, was it sweet. Waaaaaayyyy too sweet. There were five of us splitting the drinks and we couldn’t come close to finishing them. And the drink contained neither butter nor beer, which seemed wrong given the name. But then– a ray of hope appeared– we had an idea. The Boar’s Head Pub, where we’d bought the sickly sweet swill, also served its own signature dark beer and maybe– just maybe– the stuff could be salvaged. We mixed the dark beer 50/50 with the sugary butterbeer, tasted it, and saw that it was good. And I decided then and there to perfect the recipe for my own butterbeer once I got home.

Continue reading

The Grey Lady, Part XIII: Finished!

Here it is, the final outfit in action at Misti-Con 2015! I’m very happy with how it turned out– it’s always nice when something looks almost exactly as you’d pictured it (even if it did take a lot of alteration to get that way). Sure, there are a few tiny differences, but the costume was very well-received and I had a lot of fun wearing it. Definitely worth making, though if I attend the convention in 2017 I am definitely bringing more costumes with me– got to keep up with all the amazing fans there!

GL rocks

Continue reading

The Grey Lady, Part XII: Hemming and Trim

Once all of the structural elements of the dress were done with all the seams finished, I finally hemmed it. The first step was putting it on the dress form and doing a preliminary pinning, but then I put it on myself and had my husband adjust the height of the hem so it actually worked for me (not making the same mistake I did with the bodice here). I trimmed the extra fabric and used the seam binding to bind the raw edge of the hem, then used that edge to machine-hem the dress with a blind stitch. The video below explains it fairly well.

You don’t really need a blind hem foot to do this– just keep a close watch on where your stitches are landing relative to the folded edge. Especially with a more textured fabric, it won’t matter if your stitches are a little bigger than expected.

GL hem

So I’ve got the main dress done, but I wanted to add a little something to embellish it at the neckline. I wasn’t about to do any hand-embroidery or beading in my limited timeframe, so I looked for some nice appliques instead. I looked at a lot of different types, including venise lace, soutache, and even sari trim, but eventually I decided on some silver embroidered appliques in a vaguely floral pattern. They’re not too shiny and not too ornate, so they embellish without overpowering.

Continue reading

The Grey Lady, Part XI: Accessories

While I’m waiting to finish up the dress, I’ll need to acquire some accessories.

I’d always planned to have a belt on this dress, but while the sewing pattern had an option for a fabric sash it just looked kind of boring. I wanted to find something made of metal or thin chains– kind of a veiled reference to the traditional “ghost = chained to the earth a la Jacob Marley” thing. A little searching online revealed that what I really wanted was a “concho belt,” traditionally worn in the Southwest and made up of silver medallions. The one I bought arrived looking pretty shiny, but I painted on some black acrylic paint, waited for it to dry a bit, then wiped most of it off with a paper towel– the paint stayed in the cracks (hard to see in the picture below) and gave it a nice antiqued feel.

GL belt

Continue reading

The Grey Lady, Part X: Sleeves

So, I know that the “proper” way to get the sleeve-puff look is to sew a separate chemise and allow it to puff through openings in the oversleeve. I’m not going to do that. Instead, blatantly borrowing from numerous online tutorials on constructing sleeves for “Merida” costumes, I’ve constructed the puff and non-puff sections of the sleeves separately, and sewn them in a column to form the sleeve.

To draft the sleeve pattern, I took the basic straight sleeve and marked where I wanted my puffs to be. Then I cut along the lines and re-drew each piece, adding in seam allowances. The elbow puff is tapered at the inside elbow joint so it won’t bunch when I bend my arm. Similarly, the shoulder puff is cut right at the section of the sleeve under the armpit to avoid bunching.

GL sleeve drawn pattern

Continue reading