For her third and final Disney dress, my daughter picked Mulan.

I again started off with a solid yellow dress from Primary.com, and decided to make a top to go over it.

For her third and final Disney dress, my daughter picked Mulan.
I again started off with a solid yellow dress from Primary.com, and decided to make a top to go over it.
After Elena of Avalor, the next princess my daughter was dying to be was her sister, Isabel.

This one was the easiest of the three dresses– I just found a basic blue dress with puffed sleeves and ruffles (sadly, Primary.com didn’t have anything that worked, so I had to get it on Amazon), and used some gold fabric paint to make the gold trim on the bodice and the swirls on the ruffled parts.
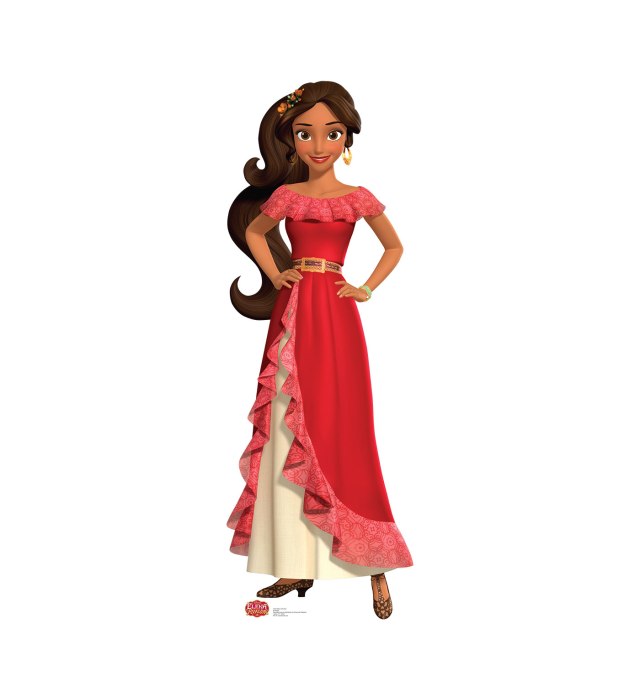
Our family is going to Disneyworld this fall, and my daughter is (of course) really excited about it. Not just the rides and attractions, but the prospect of meeting Disney princesses. When we first booked the tickets, in a fit of recklessness I promised to make her some princess dresses to wear to the park, so here we are. These aren’t going to be full costume-quality dresses– rather, they’re going to be soft and comfortable knit dresses she can play all day in, with some nods to the princess style.
Her very favorite princess right now is Elena of Avalor, so it was a given that one of her dresses would be Elena’s.

For Her Highness’s princess birthday party I wanted to carry the theme through in more than just the castle, so I decided to decorate some cookies to match. I thought about doing elaborate royal icing decorations like last year’s mermaid cookies, but eventually came to my senses and realized that with the extra-complicated cake I just wasn’t going to have the time. Instead, I decided to cover the cookies in fondant (like my Victorian cameo cookies) and try a new technique for decorating– the stencil.
Cookie stencils are very popular these days among decorators as a way to get an elegant, easily-reproducible design. I picked up a stencil set on Etsy that included a crown and a fleur de lis, figuring I could use both and still stay in theme.

Done! Finally done! And it turned out so gorgeous! I’m so excited about this dress– despite the changes of plan and occasional difficulties, I really love it. I just hope my daughter will wear it…
When we left off, I had just finished the paned sleeves, which are just one of the many fabulous features I can’t stop squee-ing over. To finish up I stitched the rose clusters to the skirt bustling points, then made a few more rosebuds of various sizes to finish off the neckline along with some silver leaves. It took several tries to get an arrangement I liked for the neckline, but eventually I settled on one and stitched it down.
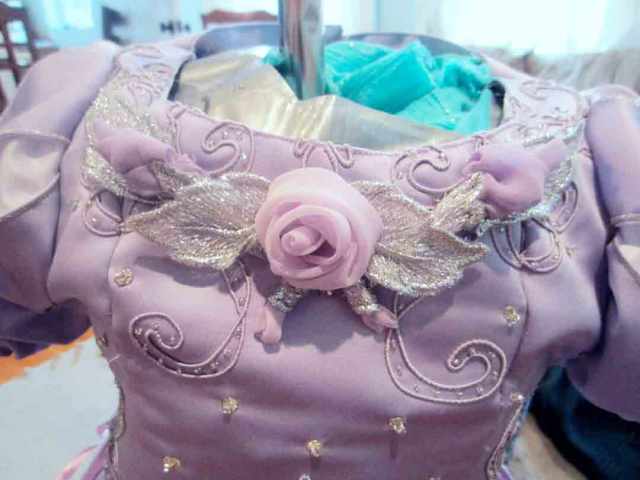
And voila! Finished!

For the previous work-in-progress posts, see below:
Final Thoughts:
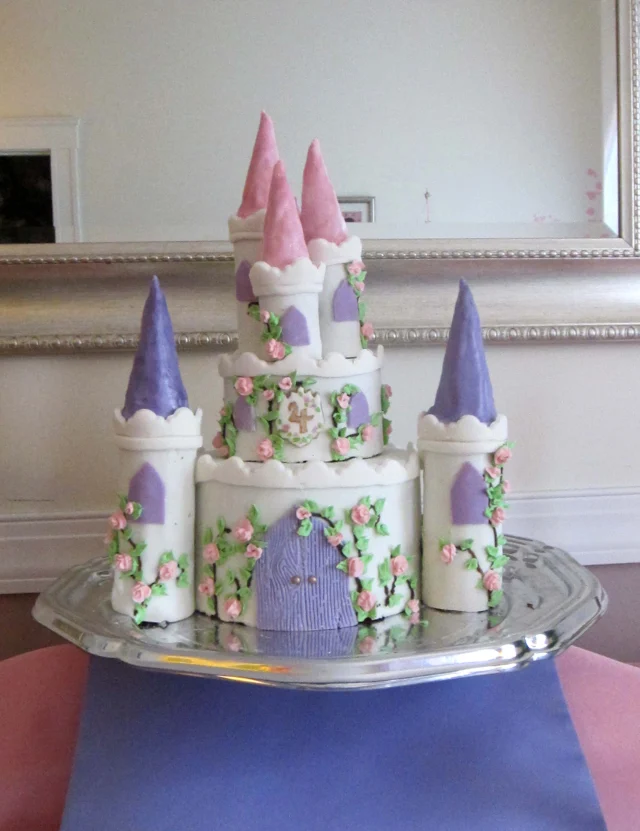
So far you’ve seen the progress photos for my daughter’s Birthday Princess dress, but what’s a princess party without a castle cake? I knew I had to make one, so I started collecting fondant cutters and images of pretty cakes several months before they’d actually be needed.
After much vacillating I decided to make it a two-tier round cake with two towers at the base and three on the top tier. Since there was plenty of leftover cake last year, I kept the same sized pans as before– 7″ on the bottom (three layers) and 5″ on the top (two layers). Color scheme would be white, pink, and purple, and I’d decorate it with climbing roses and lacy crenellations.
Fair warning, this is not a tutorial post– the process was so involved that I just couldn’t take the time to get pictures of every step and post recipes and instructions for all of the components. I may do individual posts on some of the techniques, though. So for now just sit back and enjoy the pictures and general instruction summary!
To add to the “princess” look of this dress I wanted to do paned sleeves– you may know them as “Snow White sleeves”– where a contrasting-colored lining peeks through slashes in the outer sleeve. However, since I didn’t want to make two separate layers I decided to simply insert strips of white satin into the main purple sleeve, pleating the purple fabric so it looked like the white was a separate inner sleeve. For the technique I relied heavily on this tutorial, which is awesome.
For my basic sleeve pattern I wasn’t confident enough to draft my own– I really didn’t feel like measuring and guessing about the best curved shape, so I raided the $1 pattern bin at my local store and picked out a girls’ pattern that had puffed sleeves to use. I cut the sleeves out, then cut each one into four pieces and inserted 2.5″ wide strips of white satin between them, ironing the 1/4″ seam allowances towards the purple fabric .

When making the bodice it took me a while to decide how best to display the embroidery on the fabric. After much vacillating and even more pinning, I decided to use the existing bottom hem of the bodice, which would forfeit the pretty design along the top edge but which would let me have a more structured bottom edge. I took a deep breath and started disassembling the bodice.

Once I’d figured out what I was going to do, I had to prepare the bodice for cutting– that meant slitting open the side seams and removing the boning from the front, and then re-shaping the bodice entirely to change it from being curved over the bust to being flat (as 4-year-olds are not known for their curved bustlines).

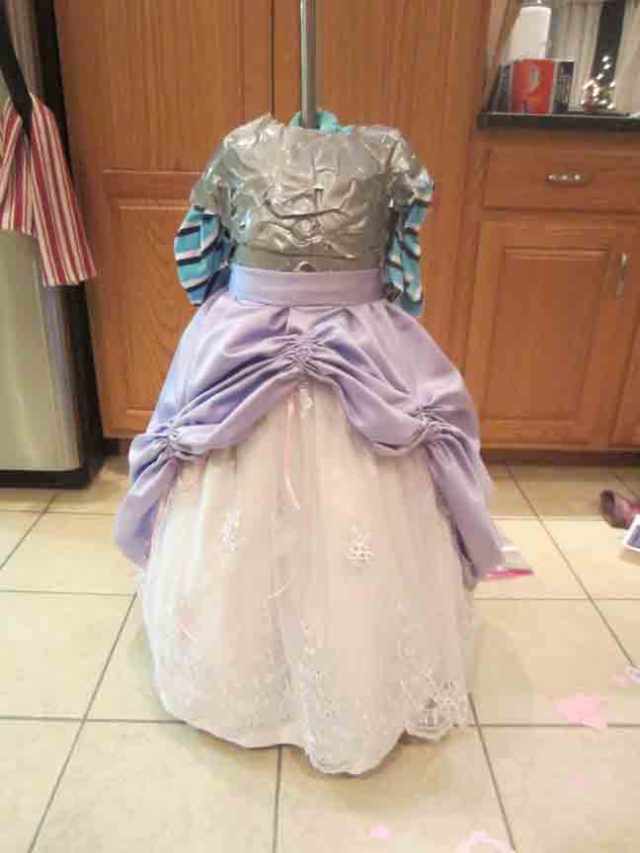
So I finished the white underskirt, which I figured would provide the necessary structure to let me drape the overskirt and eyeball how to do the bustling. But first I had to make the basic skirt.
Once I had all of my fabrics and sketches I decided to start with what I hoped would be the easiest part of the dress– the white underskirt. I started off by simply cutting off the upper portion of the dress’s bodice, leaving a good 3″ of fabric attached to the skirt to make a waistband.


Next I turned my attention to the inside of the skirt– there was already a nice lining and net petticoat layer, but it wasn’t quite poofy enough. Luckily the lavender bridesmaid dress came with a netting layer that was exactly the same length as the white skirt, so I ruthlessly ripped out, gathered, and stitched it just below the petticoat lining. Presto! Poofy white satin underskirt!


Before I went any further I had to make sure the skirt would be the right length on my daughter, but since she hates to stand still (like any almost-four-year-old) I needed a substitute for fittings.
