1830s Sleeve Supports

1830s-sleeve-supports

When I decided to make my 1830s day dress, I knew that I was going to go BIG. Sadly, the gigantic sleeves of my dress were never going to *stay* gigantic without some kind of support on the inside. While the Truly Victorian pattern suggested that I make a version of the evening puffed sleeve out of netting or something similarly stiff to use for a sleeve puffer, I decided to go in a different direction.

Kenna (a talented costumer and photographer) had the brilliant idea to make wired sleeve supports, kind of like mini hoop skirts for your arms– and it looked like a perfect solution. Using her post as a base, I used large plastic cable ties to make hoops that were 30″ and 25″ in circumference (I clipped them and melted the ends with a flame to smooth them out), and put them together with painter’s tape to determine the best arrangement to puff out the sleeves properly.

1830s-supports-rings

Continue reading

1830s Butter Yellow Day Dress, Part III: Sleeves

Fashion plate, 1830s | Flickr: Intercambio de fotos

Ah, gigantic sleeves– is there anything more iconic of the 1830s? I was very excited to get these onto my dress to get the real 1830s look. That being said, after reading a bunch of blogs about 1830s sleeves, I came to the conclusion that the sleeve pattern that came with the pattern wasn’t quite big enough. You heard me: not big enough.

Continue reading

1898 Black Moiré Convertible Gown, Part III: Sleeves

Up next were sleeves. I wanted them to be puffed, to broaden the shoulder line, balance out the skirt, and make the waist look smaller by comparison. Before I changed my neckline back to off-shoulder I originally took my inspiration from the famous Worth ironwork gown– its sleeves are made of gathered tulle with velvet bows, and I thought they’d go well with the bows on my design.

Beautiful House of Worth 1898-1900 Black & White gown...

I ordered some black tulle with tiny stripes and spots on it to make my sleeves– I liked the subtle texture of the pattern, as opposed to plain black.

Continue reading

Regency Pashmina Dress, Part III: Sleeves

pashmina-sleeves.jpg

To add some interest to the design of an otherwise relatively plain dress, I decided to add a small puff to the top of my long, straight sleeves. Not only that, but I wanted to ruch the puff to give it even more texture and dimension.

I wanted to use existing patterns for long sleeves and puffed sleeves– the problem was, my sleeve patterns are completely different shapes. As in, my puffed sleeve pattern is symmetrical and my long sleeve pattern is cut so that the seam is set towards the back. I decided that rather than try to convert my puffed sleeve pattern, I would use it anyway and rely on the fact that the whole thing is going to be too short for the difference in seam placement to matter.

Continue reading

1860s Embroidered Ballgown, Part IV: Bodice

ivory-bodice.jpg

Once the skirt was done, I got out my bodice pattern– Truly Victorian 442– and started cutting out a mockup. I cut size D for the front and size E for the back, per the measurements in the instructions, and stitched the pieces together as instructed. It went together pretty fast, all things considered– I’m particularly happy with how well the curved back seams match up and how easy they were to stitch… take note, Simplicity 4055!

I tried it on first over my dress form just to see if it was anywhere near the right size. The dress form is about right for my corseted measurements, anyway, since the corset doesn’t actually reduce my waistline so much as shape it more attractively. It looked reasonably close.

ivory-bodice-mockup

Then I actually tried it on myself, over the hoop skirt and skirt, to see how much work I had to do to get it to fit. The problem, of course, was that my husband isn’t so great at pinning fabric on me, so had a difficult time lining things up to see where the trouble spots were. Also, he’s reluctant to pin things too tightly, even though I pointed out that a bodice like this is supposed to be form-fitting. In the end, I determined that there weren’t any major problems with the pattern as drafted (at least none that couldn’t be fixed by a little tweaking at the side seams), and decided to leave the pattern unaltered.

Continue reading

1840s Day Dress, Part II: Bodice Mockup

calico-mockup

So I had my fabric– red calico– and my pattern– Laughing Moon 114. It was time to get to work!

As usual, before trying to make the actual bodice I made a mockup from the pattern, to ensure that it fit properly. Luckily for me, the measurements and proportions of my dress form are pretty darned close to my corseted measurements, so I can do most of the fitting work on the form rather than having to put on the mockup every time.

The bodice is constructed out of a fitted lining and a gathered overlay, so I figured that I really only needed to mock up the lining to make sure it would fit. I cut out the entire bodice lining (View B, size 14) and tried it on.

Continue reading

Queen of Hearts Costume, Part V: Sleeves

Once the main dress was done, I made a set of detached sleeve-puff thingies to wear on my arms. I bought some black satin and stitched it in stripes with the extra red satin from the back side of the shawl. Once I had two long striped pieces, I cut out some equally long but much narrower pieces of red cotton and attached them to the striped sections as a lining.

q-hearts-sleeve-stripe

The inner layer being narrower than the outer layer allowed the striped layer to puff out a bit along the vertical axis. Then I sewed narrow channels into the top and bottom edges and ran elastic through them, which gathered the sleeves horizontally into nice puffs that would stay up on my arms. I did have to stuff the puffs with fabric scraps to give them body– otherwise they were a bit droopy. Next time I’ll take the time to find some netting to do the stuffing– it would hold its shape better.

q-hearts-sleeve

I finished off the costume with a tiara from eBay and a pair of black satin gloves. Hint: do not balance your tiara on your head just to see how it will look, then forget it’s not pinned on and bend over to look at something– it will fall off, clang on the floor, and lose half a dozen tiny rhinestones which you will then have to locate and glue back in. (sigh)

Stay tuned for pictures of the finished costume!

Upcycled Birthday Princess Dress, Part VIII: Paned Sleeves

To add to the “princess” look of this dress I wanted to do paned sleeves– you may know them as “Snow White sleeves”– where a contrasting-colored lining peeks through slashes in the outer sleeve. However, since I didn’t want to make two separate layers I decided to simply insert strips of white satin into the main purple sleeve, pleating the purple fabric so it looked like the white was a separate inner sleeve. For the technique I relied heavily on this tutorial, which is awesome.

For my basic sleeve pattern I wasn’t confident enough to draft my own– I really didn’t feel like measuring and guessing about the best curved shape, so I raided the $1 pattern bin at my local store and picked out a girls’ pattern that had puffed sleeves to use. I cut the sleeves out, then cut each one into four pieces and inserted 2.5″ wide strips of white satin between them, ironing the 1/4″ seam allowances towards the purple fabric .

birthday-princess-sleeve-process

Continue reading

The Grey Lady, Part X: Sleeves

So, I know that the “proper” way to get the sleeve-puff look is to sew a separate chemise and allow it to puff through openings in the oversleeve. I’m not going to do that. Instead, blatantly borrowing from numerous online tutorials on constructing sleeves for “Merida” costumes, I’ve constructed the puff and non-puff sections of the sleeves separately, and sewn them in a column to form the sleeve.

To draft the sleeve pattern, I took the basic straight sleeve and marked where I wanted my puffs to be. Then I cut along the lines and re-drew each piece, adding in seam allowances. The elbow puff is tapered at the inside elbow joint so it won’t bunch when I bend my arm. Similarly, the shoulder puff is cut right at the section of the sleeve under the armpit to avoid bunching.

GL sleeve drawn pattern

Continue reading

The Grey Lady, Part I: Sketches

Just as I finish one costume, an opportunity appears for another one…

So there’s a big Harry Potter event coming up over Memorial Day weekend (yay, Misti-Con!), and I’ve made plans to attend! Of course, I need a fabulous costume to wear and some basic Hogwarts robes just won’t cut it, not least because I’m way too old to be playing a high school student, no matter what sitcom casting directors would like you to believe. I racked my brain for an in-canon idea, and came up with the idea of being Helena Ravenclaw, a.k.a., The Grey Lady (House Ravenclaw’s ghost).

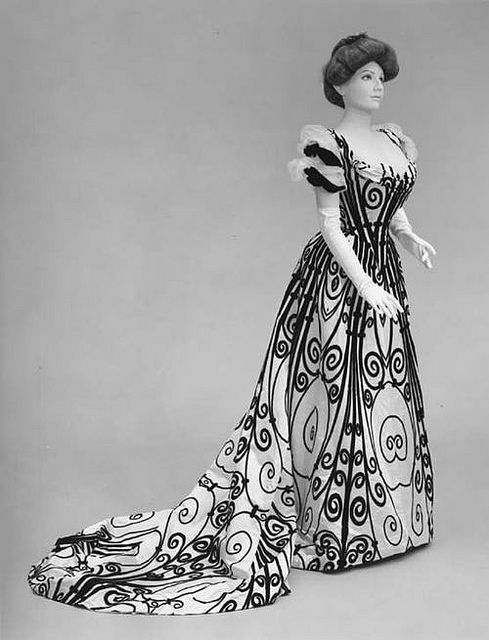
The book is short on descriptions, noting only that she wears gray and has long hair and a long cloak. The movies show her in two different outfits– the first is kind of Renaissance German in style (forgive me, fashion historians, this is my closest approximation of the era), with massively puffed sleeves and a full skirt, while the second (in a much longer scene) is rather medieval. I decided to split the difference– I don’t have the time or the resources to sew a Renaissance gown and all its underpinnings, but I’m making something a bit more complicated than a basic medieval-style outfit.

GL movie gownGL movie gown 2

As is my wont, I first tried to find an appropriate dress somewhere else to modify with extra fabric and trims. There were a few possibilities, but most were pretty expensive and none were just what I wanted. I finally decided that I would have to make one myself, which required a bit more creativity. Here are a few of my ideas, which incorporate the various elements that caught my eye:

GL sketches

I definitely want to princess-seam the dress to keep the lines sweeping, and I like the idea of having extra gores in some flowy fabric to add to the ghostliness of the look and provide more movement to the skirt. I’ve also become attached to the “Merida” style sleeve puffs, since they kind of suggest the puffed-sleeve look from the first movie scene, but keep the slimmer lines of the second. No historical accuracy here, that’s for sure.

To start, I found a Simplicity 9891 sewing pattern in the $1 bin at my local fabric store, and snapped it up to use as a base for my dress. It’s got the basic shape, and if the online reviews are any indication it can be easily modified.

Up next: fabrics!