
So after months of working on this costume, I thought I’d gather all the posts in one place and wrap up with some final thoughts.
Part III: Patterning and Mockup
Fabric: The original dress was made out of crocheted tinsel yarn, though I managed to find a decent approximation with what was listed as “crochet lace” (totally not crocheted, you can tell). In retrospect I think my fabric was just a bit heavy, but since my best alternative was much too light it was the best I could get. If you’re looking for something similar, you may want to try Aliexpress.com, where I saw some crochet lace with tiny sequins in it that might mimic the original tinsel better.
I lined the dress with cotton crinkle gauze because I wanted it to have some stretch to allow me to fit the bodice snugly without needing boning. It worked, but the gauze I used ended up feeling kind of thick overall– go for as light a gauze as you can, to avoid being too hot with all of the necessary layers.
Structure: Most of my decisions on structure were based on the desire to avoid the dress sagging/stretching downwards from the sheer weight of the skirt. The princess seams in the bodice were a good call, both to aid in shaping and minimize stretching, and they were hardly noticeable once the beetlewings were sewn on. I also definitely got it right with my idea for skirt structure– the extra support of the separate yoke really reassures me that this dress will not stretch out longer over time (like the My Fair Lady dress did), and on a similar note I’m glad that I underlined the crochet lace with tulle, which kept it from losing its shape as I sewed.
I will note that in the future I may opt to wear a corset under the dress for a properly hourglassy figure, even if Ellen Terry’s contemporaneous letters expressed joy about how she didn’t have to wear one under the dress onstage.
Beetlewings: All the write-ups of the original dress say that it used “1,000 beetlewings,” like that’s some sort of huge number. Don’t listen! I used more like 1700 and I could’ve added more to the skirt without it looking overdone. And since I’m fairly sure that the wings they used in the original dress were smaller than the ones I have now, I’m betting the original used at least that many as well. To save on cost, definitely buy them in bulk on Ebay from Thailand instead of trying to buy them in the U.S. And since you’ll have to drill extra holes in them yourself anyway and trim them to size, you may as well get them undrilled rather than spending the money on predrilled wings.
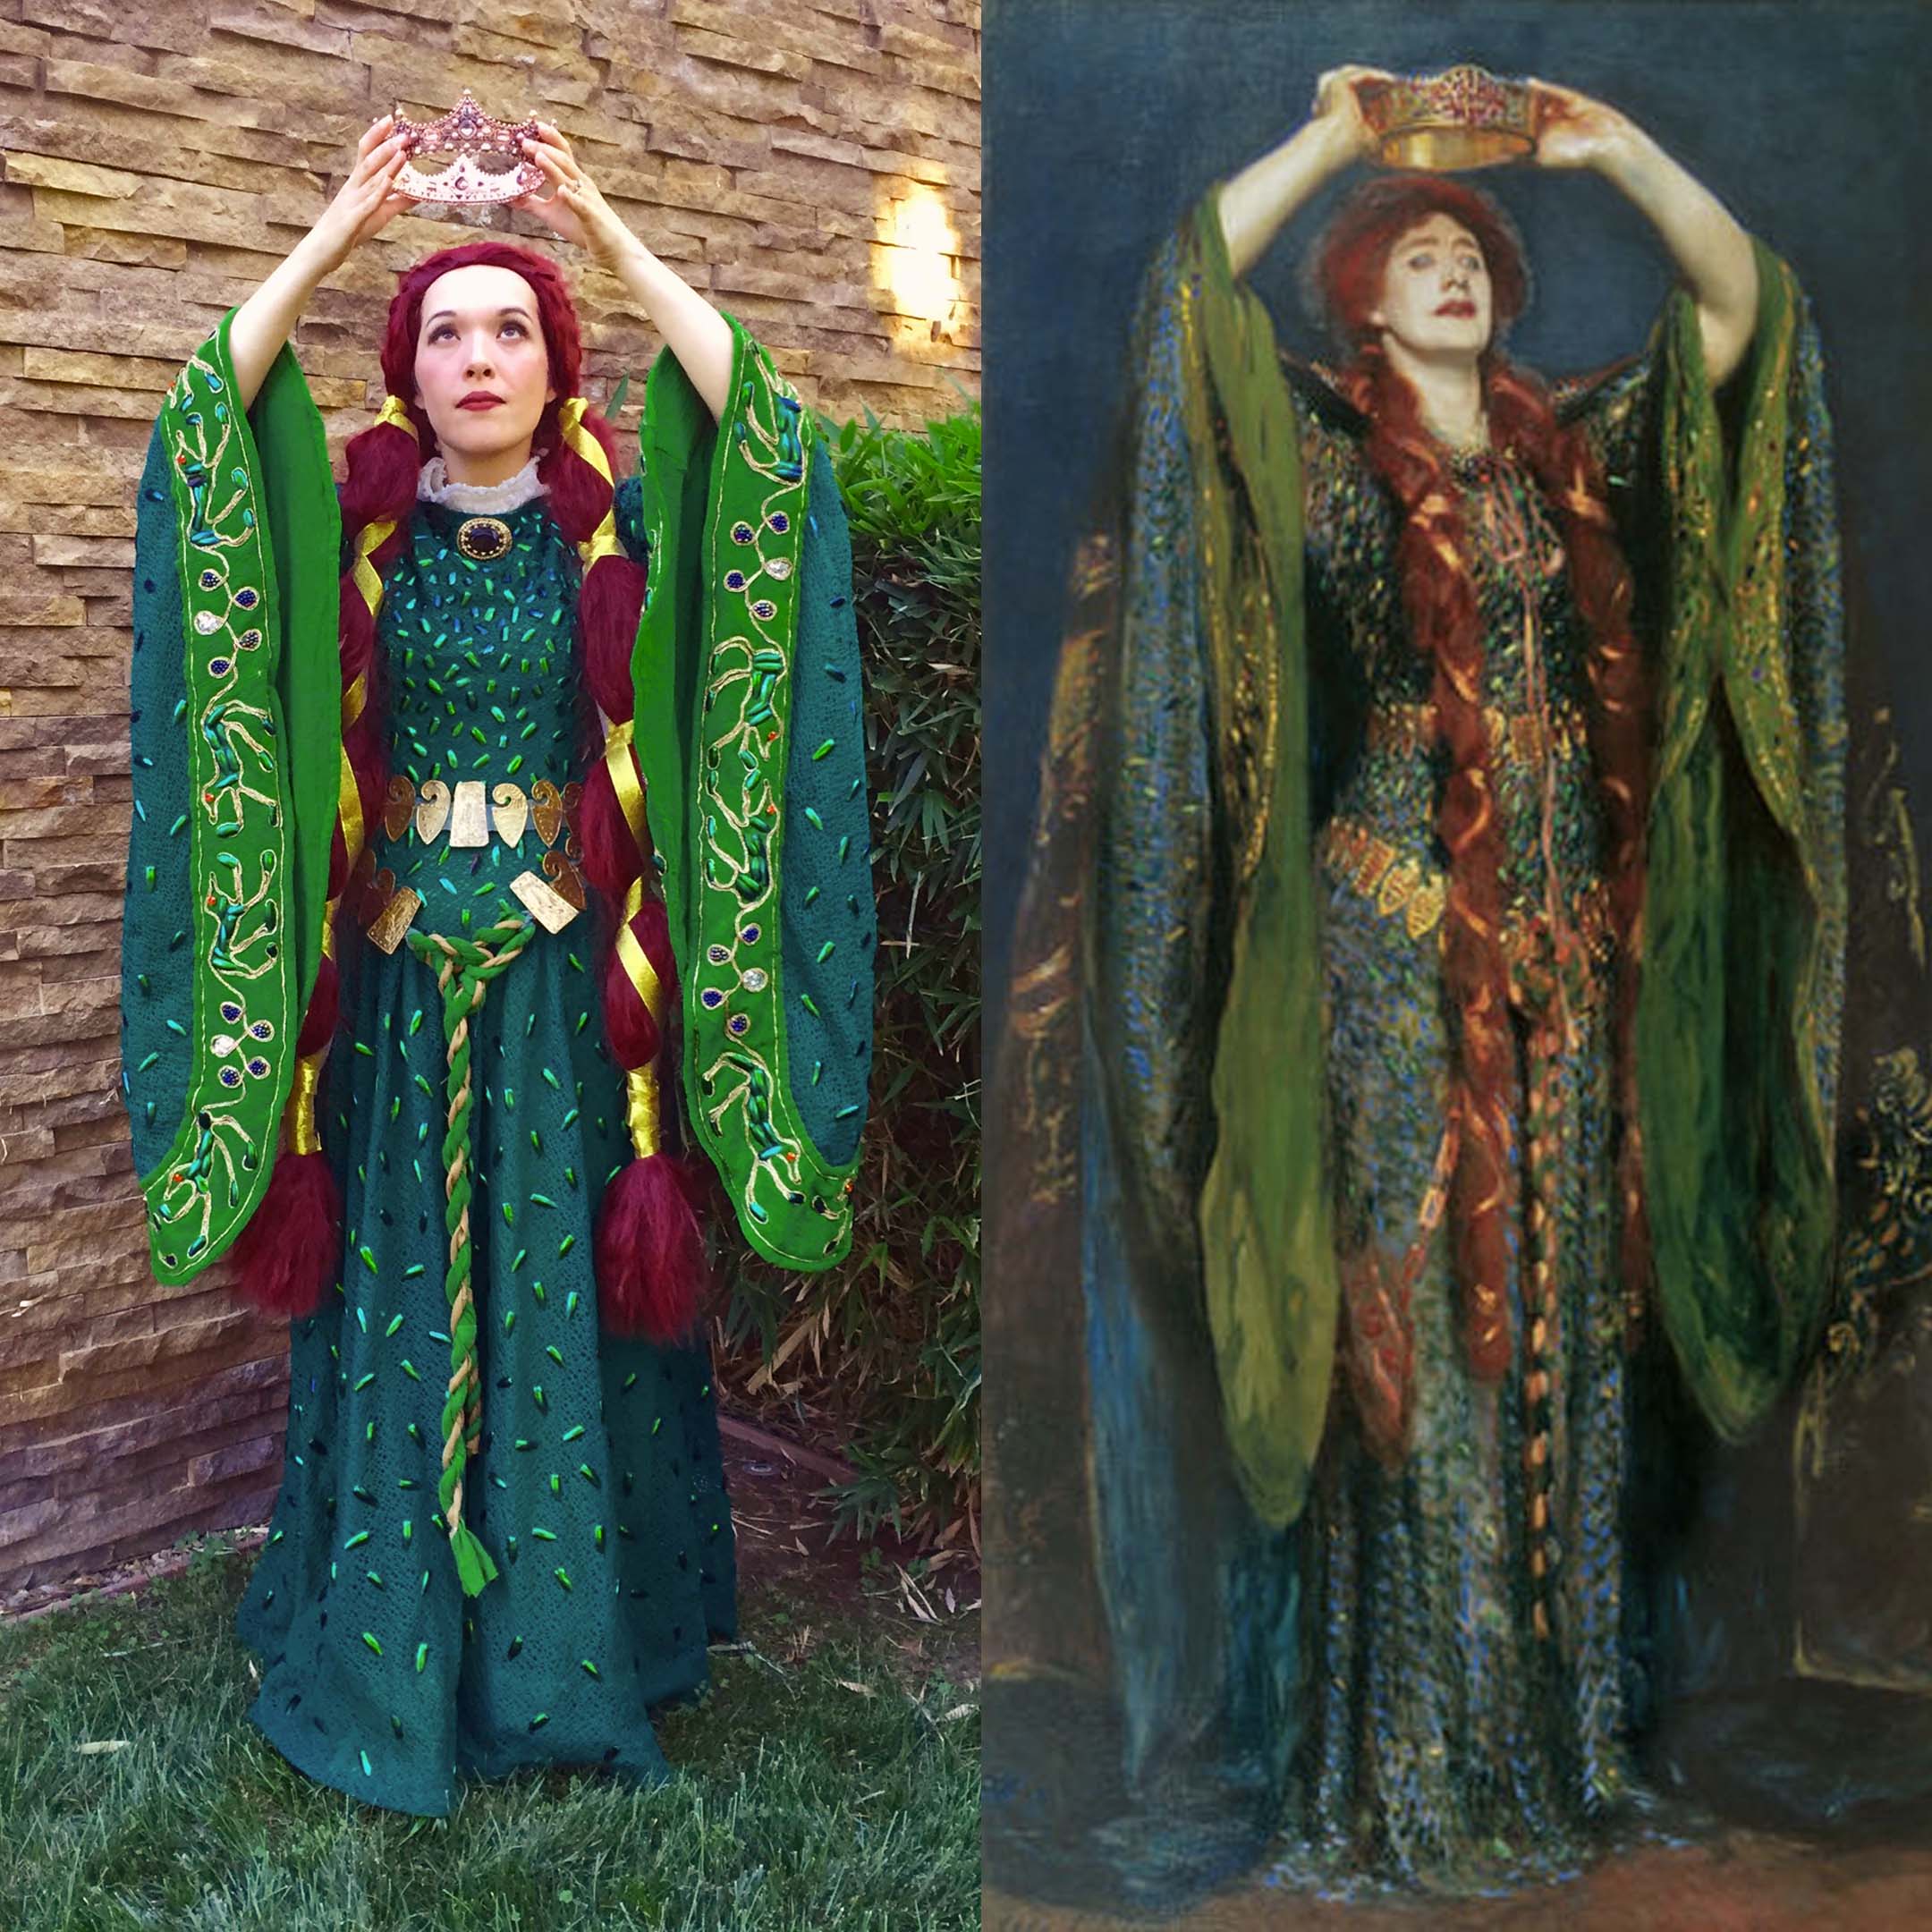
Sleeves: I know I got the sleeve shape right in terms of the elbow crook being at the underarm seam– it was clearly that way in the original– but honestly, I don’t like it. It makes the sleeves twist weirdly around your arms when you try to bend them, especially when you raise your arms in that iconic right-from-the-portrait pose, and it’s uncomfortable to wear. Really, the only way it works is when your arms are down by your sides. If I were doing this again I would move the curved seam to the top of the sleeve, relying on the crochet lace and beetlewings to disguise the seamline, historical accuracy be damned.
Trim: Despite my belated realization that I’d made my sleeve trim too wide and thereby messed up the proportions, I’m still at least 90% happy with it. If I could go back I might have purchased one more skein of gold cording to double up on the border lines (like in the original), but I don’t know if I’d have bothered to correct the trim width– couching that many gryphon motifs was difficult enough, I don’t even want to think about doing 30% more…
Belt: That being said, I do think I may redo the belt at some point. The links are just too big and they look costume-y, which I was trying to avoid (at least, as much as one can while wearing a giant wig and a dress sewn with shiny green beetlewings). And I’m considering getting some gold foil to glue over the links for a “real metal” look, rather than paint.
Wig: I’m definitely going to restyle the wig the next time I wear it– looking at the painting again, the gold ribbon was too wide and wasn’t wrapped as densely as it was in the picture. And I’ll probably get some diluted glue to smooth over the wig to avoid all the flyaways I ended up with by the end of the night. Or perhaps a bunch of hairnets?
Anyway, all in all this was a really fulfilling project– I was extremely happy with the final product and had a great time wearing it, and learned some new skills along the way!
UPDATE: In 2023 I was thrilled to be able to wear this dress to the Boston Museum of Fine Arts exhibit pairing John Singer Sargent paintings with some of the original gowns shown in them! I got to view the painting up close, and get a really good look at the gown itself on display– I even got to chat with the exhibit curator, which was a great experience!


