
Once the dress was done, I turned my attention to the wig I’d need. I don’t know if Ellen Terry really had almost floor-length hair when she played Lady Macbeth or if she wore a wig, but it’s a prominent feature of her costume in the photos and in the painting, so I had to follow suit.
There were plenty of long (like, knee-length) cosplay red wigs available, but they were all perfectly straight and didn’t look particularly full– when divided into two plaits they were definitely not going to be sufficient for the look I was going for. Rather than try to figure out how to plump them up, I decided to go with a textured wig– or rather, two textured wigs that I’d cobble together.
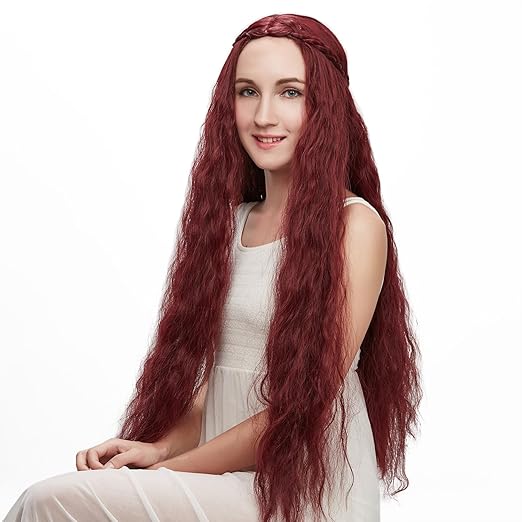
I ended up with this one— it’s designed to be a Lady Melisandre wig from Game of Thrones and it’s a dark red color with lots of texture, so it definitely had the volume I was looking for. It also has a nice braiding detail at the top. I bought two.
Once they arrived, I took apart one wig by cutting the wig cap into strips to make wefts. I cut the cap in sets of three wefts right up to the point where it started curving around the head, then cut that curved skullcap-ish section right up the center, for a total of four weft strips (two shorter, two longer) and two denser sections. Here’s a diagram of the cuts:

Then I divided my wearable wig into two sides (following this very useful tutorial to avoid showing the wig cap at the part) and divided each of those sides into an upper and lower section. The upper sections were clipped aside, while I worked on one lower section at a time.
I spread the hair on the lower section over the floor (which was covered in parchment paper to avoid glue getting on the hardwood). I glued the longer weft across the hair about 8″ up from the ends, then glued the dense skullcap section on top of that a few inches down. Finally, I glued the shorter weft section over the top of that, at the same level as the first one.

Once I let down the upper section of hair and gathered the whole thing into a ponytail, the glued sections weren’t really visible except as a slightly thicker section of hair. I tied the long ponytail into segments using cut-up hair elastics (since trying to use them the normal way was next to impossible on such long hair), then wrapped the whole tied-up ponytail with gold ribbon. I stitched the ribbon in place using light brown thread to keep it from slipping out of position.

I’m actually really happy with how this turned out, and how easy it was, relatively speaking. Yes, it’s pretty heavy, and no, I don’t think it’ll stand up to much abuse, but it looks decent and it took me about an hour to style, so I’m counting it as a win!

Pingback: Lady Macbeth Beetlewing Gown, Part XV: Final Thoughts | It's All Frosting...