
So, time for the finishing touches! You can see in the photo below that in the center panel there’s an arc of large silver sequins just above the floral appliqué around knee level.

I bought 10mm silver paillettes to attach to the dress– I only needed 20 paillettes for that section, but then I realized for the first time that the dress actually had more paillettes around the hem! Good thing they came in a package of 200…
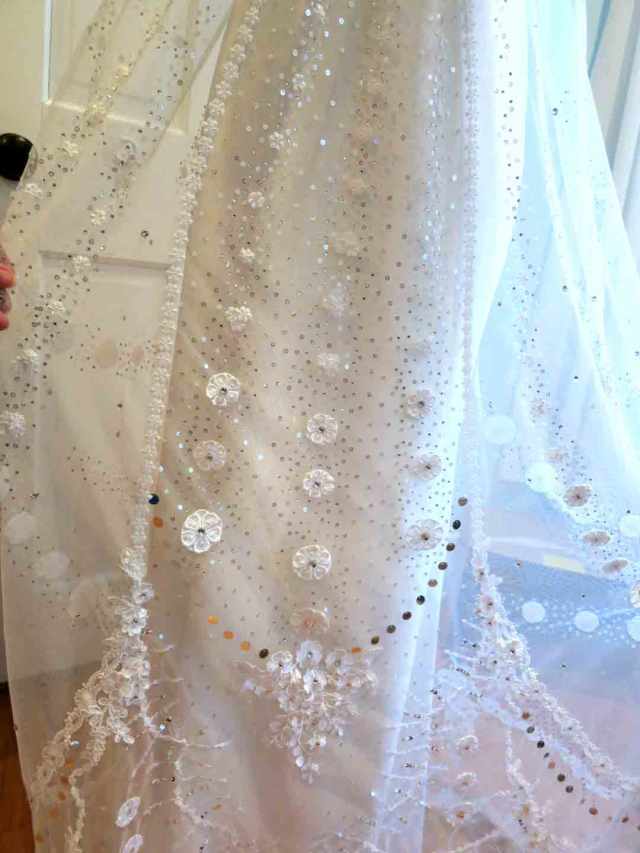
So, not only are there swags of embroidered trim near the hem, but there also appears to be a row of silver paillettes following the lines of that trim with short line segments connecting the two. It’s really only obvious in this one photo, so it’s no wonder I missed it on my initial viewing:

See the little gray dots following the lines of white trim? Clearly paillettes. However, I can’t tell what the faint white lines are– it’s possible that, like the sleeve and neckline detail, they are embroidered lines of thread with clear sequin “leaves” on either side.

But quite honestly, I did not have the patience to work those all the way around the hem of the gown, which is 120″ in circumference. It was just not going to happen. However, I was willing to glue rows of 4mm moonshine sequins connecting the paillettes to the trim– still a pain, but not nearly as bad as doing the leaf thing. All I had to do was place a line of glue dots and add sequins, and given all my practice it didn’t take nearly as much time as stitching lines of thread would have. I’m pretty sure that this isn’t perfectly accurate– the lines in the photo look completely solid, which is not the case with sequins– but I really did not want to be embroidering 120+ line segments, much less at the hem of the gown where no one would see them! (Honestly, if I’d thought of it in time I would’ve glued the “leaf” sequins to the skirt section rather than stitching them– it would’ve been a lot faster and no one would be looking that closely at the bottom of the skirt)

Anyway, with the paillettes and small sequins securely glued down, I broke out my rhinestones and started adding them to the body of the gown for extra sparkle. You can see that there are widely-spaced scattered rhinestones between the side swags here:

And there are a few sprinkled above the line segments on the sleeves (above) and neckline, and some on the back of the dress, apparently at random.
I used both 6.3mm and 5mm stones on the body of the dress, adding a few of the 3mm stones on the sleeves. Then I added rhinestones to the center of every flower (except the tiny ones in the narrowest trim) in the appliqués on the dress– not necessarily required by the source images, but I thought they’d look nice.

* Quick Tip: if you’re working with tiny rhinestones and don’t want to go to the trouble of flipping them all right-side-up individually so they’re ready to pick up with your toothpick/Q-tip/tweezers/whatever, just pour them onto a cheap paper plate to use as your palette. You can flip a whole bunch of them at once just by “twinging” the side of the plate so it vibrates up and down. Repeat as necessary.
As a final note, I will say that once all of the embellishment was done and I’d tried on the dress, I had to adjust the hem height upwards by about an inch because the weight of all the sequins and glue had stretched out the net that much. Luckily I’d only tacked down the scalloped hem trim with thread and hadn’t glued anything over it, so I was able to easily remove and re-position it higher up on the dress to make up the length. Keep this in mind if you try making this dress yourself– English net stretches out! I will make sure to store this dress flat rather than on a hanger, just to avoid further stretching. If it ever does stretch out more I’ll have to take it up from the neckline and hope to hide the alteration under the extra drape of netting, because there’s no more room to lose at the hem.
I know you probably want to see the finished dress, but you’ll just have to wait until I finalize the rest of the outfit!

great attention to detail
LikeLike
I feel like I got a preview of the next post already! This is a really beautiful dress and an accurate re-make. Thanks for sharing!
LikeLike
Pingback: My Fair Lady Ballgown, Part X: Final Photos! | It's All Frosting...
The more I look at your design of overlay can’t see any side seams. Is that correct ? Where are they? Ok you don’t have to answer previous questions. I saw the width & where you placed rhinestones.
LikeLike
Like I said in my overgown post, there is one seam down the center back. https://itsallfrosting.wordpress.com/2017/02/11/my-fair-lady-ballgown-part-iv-overgown-construction/
I suggest that you go through all of the posts for more details– it should all be there!
LikeLike